Filling a large planter may seem simple, but doing it correctly can significantly impact the health and longevity of your plants. Whether you’re enhancing your patio with large outdoor planters or setting up a garden display using large plant containers in Vancouver’s changing climate, proper filling techniques are essential.
Here’s a complete guide to filling large planter pots the right way—from drainage to soil selection—so your plants can thrive year-round.
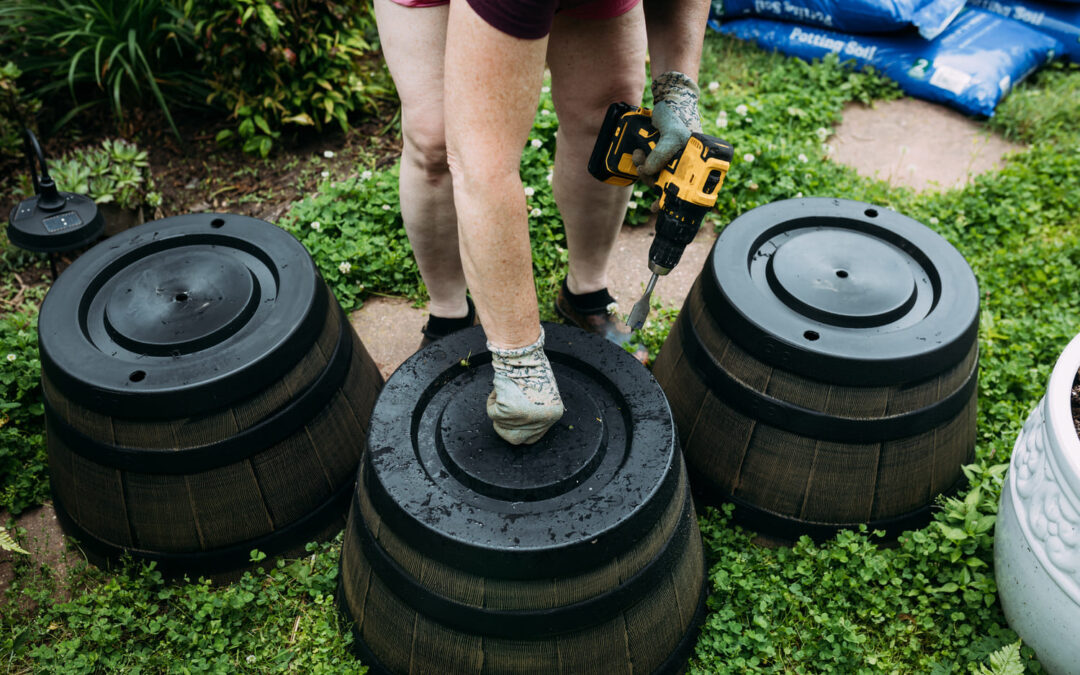
Step 1: Start with Proper Drainage
Good drainage is the foundation of healthy container gardening. Unlike garden beds, planters don’t allow water to naturally seep away, which means poor drainage can lead to root rot and mould.
If your large planter pots don’t already have drainage holes, you’ll need to drill a few at the bottom. Typically, a ½ inch hole for every square foot of bottom area, with a minimum of 4 holes for smaller planters, will suffice
Once drainage holes are in place, cover the bottom with a layer of coarse material—such as gravel, small rocks, or broken terracotta—plus a layer of landscape cloth, to keep the holes from clogging with soil and/or having the soil leach out of the planter itself.
Step 2: Add a Filler Layer (Optional for Very Large Planters)
When working with large plant containers in Vancouver, you may not need to fill the entire planter with soil. Adding a filler layer helps reduce the weight and cost of materials.
Common filler options include:
- Empty plastic pots (turned upside down)
- Recycled bottles
- Foam blocks or packing peanuts (in a breathable mesh bag)
Make sure your filler takes up no more than one-third of the planter’s height, and place a piece of landscape fabric over the top to prevent soil from mixing down into the filler.
Step 3: Choose the Right Potting Mix
Using garden soil in large outdoor planters is not recommended. It’s too dense, holds too much water, and compacts easily. Instead, choose a high-quality potting mix designed for containers. These mixes retain the right balance of moisture and airflow while providing nutrients.
For Vancouver gardeners dealing with varying rain and dry spells, a mix with added perlite or coconut coir is ideal—it offers excellent drainage and moisture retention.
You can also mix in slow-release fertilizer to keep your plants well-fed through the season.
Step 4: Position and Plant Correctly
Before adding plants, decide where the planter will go. Large planter pots can be very heavy once filled, so it’s best to place them first and then begin filling.
Once positioned, begin filling with potting mix, leaving a few inches of space at the top. This allows room for watering. Gently loosen the roots of each plant before placing them into the soil and firming it around the base.
After planting, water thoroughly to help the soil settle and remove any air pockets.
Step 5: Maintain for Success
Even with the right setup, ongoing care is essential. Large planters can dry out faster than you expect, especially in warm weather. Water deeply and regularly, and adjust as needed based on plant type and rainfall.
Also, check for any signs of overwatering, such as yellowing leaves or mould, and ensure that drainage holes are functioning effectively.
For large plant containers in Vancouver, which often face unique weather conditions, periodic soil checks and seasonal fertilizing are important to keep your plants looking their best.
Transform Your Outdoor Space with a Greenville Planter. Explore Modern Large Planters Designed to Perform!
Ready to elevate your garden or patio with beautiful, functional planters? Browse Greenville Planters’ collection of large outdoor planters and large plant containers in Vancouver—expertly crafted from durable fibreglass for lasting style and performance.